

Are You Sleeping on Your Settings?
Most players jump into a new game, set their resolution, throw in a sens that looks familiar, and maybe they mess with the field of view… Then they call it done. The settings menu gets a quick look and then never gets opened again unless something seems to be very messed up.
That’s a completely understandable way to get started, but it means many players are competing or training with a setup that quietly works against them. Some of the most impactful settings in the games you play every day are tucked away in menus most people never revisit, and a few of them can have a more direct effect on your aim or your awareness than almost anything else you can change.
Let’s take a look at some of the settings that can make a big difference in some of the games you might play, to give you some ideas of what you might be missing, or to help you open your mind for other things to examine.
Aimlabs: Game Profiles and Weapon Visibility
Before anything else, if you are using Aimlabs to train for a specific game and you have not set up your Game Profile, do that now. Game Profiles can be found in a drop down menu in Settings under Sensitivity, and they tell Aimlabs which game’s sensitivity curve to match, so when you enter your in-game sensitivity and switch between games, Aimlabs handles the conversion for you. Without a profile set up, the sensitivity you are training on in Aimlabs may not match what you play on in your game at all, which can throw off the feel during your training, and lead to some serious issues if you try to copy your sensitivity into your game of choice. It’s the first thing to get right in Aimlabs.
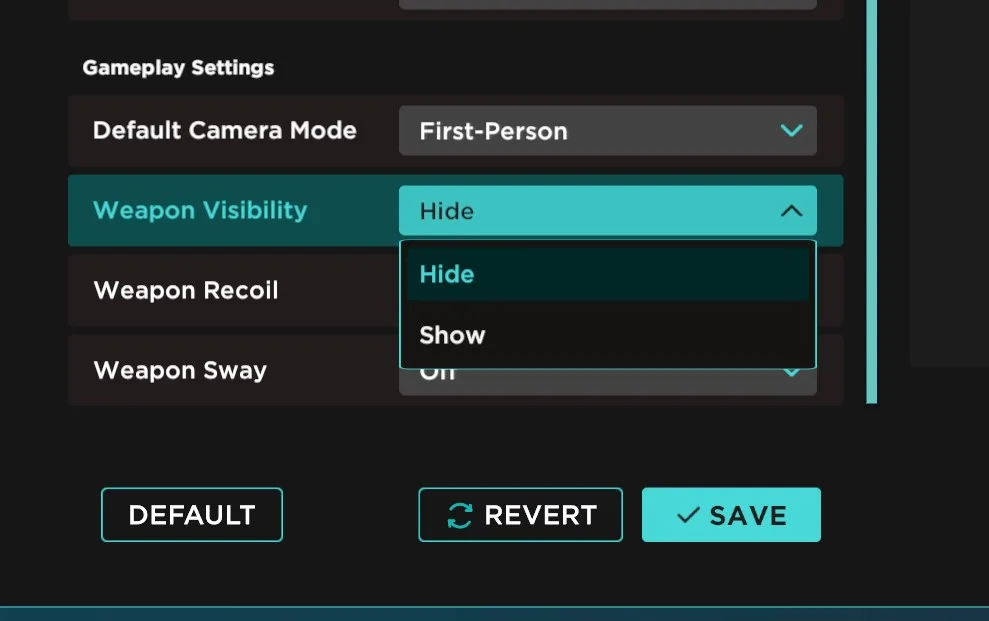
The second setting worth knowing about is Weapon Visibility. By default, Aimlabs displays a gun model in your view the same way most FPS games do. You can hide it entirely in Settings, which gives you a cleaner view of your crosshair and targets, letting you focus on raw practice with fewer visual distractions. Whether you want it on or off is personal preference and depends on how closely you want your training environment to match the feel of your game, but a lot of players have simply never thought about it, and for training smoothness or precise tracking tasks where you are trying to focus on your crosshair path rather than the visual noise of a weapon model, removing it can make the feedback cleaner and easier to read.
Counter-Strike 2: EQ Profile
CS2 has three audio EQ presets sitting in its audio settings that most players have never touched. Crisp boosts mid and high frequencies, making footsteps and gunshots stand out more clearly against the general sound mix. Natural provides a more balanced sound across all frequencies and tends to be easier on the ears during longer sessions, which is probably why many pro players prefer it. Smooth softens everything and is generally not recommended for competitive play. The point is not that Crisp is always the right choice; it’s that whichever one you are currently on is almost certainly the default, and you have never actively chosen it. Spend five minutes in a deathmatch server with each one and pick the one that makes footsteps feel most readable to you.
VALORANT: HRTF and Third-Party Audio
VALORANT has a built-in 3D spatial audio setting called HRTF that significantly improves your ability to pinpoint the direction and distance of sounds when you are playing on headphones. By default, it’s disabled. The catch that most players miss when they do enable it is that any third-party spatial audio software running on your system, things like Dolby Atmos, Windows Sonic, or virtual surround sound features built into your headset software, should be disabled. Running two spatial processing systems simultaneously does not give you double the benefit; it could introduce issues or conflicts that may even make your positional audio worse rather than better. Riot confirmed this directly in their own patch notes. If you would prefer to use Riot’s built-in option, enable HRTF, turn off everything else doing the same job, and your ability to locate enemies by sound alone will noticeably improve. If not, select “Auto-Detect” and use your third party option.
Marvel Rivals: Combat Mix and Hero Specific Settings
Marvel Rivals has a Combat Mix tab, with a preset system buried in its audio settings that most players have never touched. The default and Immersion presets prioritize a cinematic sound experience. The Focus preset amplifies the sounds that actually matter in a fight, footsteps, incoming damage, and ability activations. Switching to Focus also means turning down your Hit Indicator Volume significantly, because most heroes are firing constantly, and a loud confirmation sound on every single hit drowns out the quieter but more important audio cues around you.
Beyond audio, Marvel Rivals has something most hero shooters do not: hero-specific settings that you can configure individually for each character. These are not cosmetic preferences; they’re things like the direction of wall crawling settings, attack range indicators for melee characters that show you exactly when you are in range to land a hit, and healing reticle feedback for supports that confirms when your healing is actually connecting. Most players have never opened these menus. If you main any hero, it is worth spending a few minutes in the practice range looking at what options are available for them specifically.
Apex Legends: FPS Cap Ranges
Apex Legends has a longstanding quirk in its engine where certain frame rate ranges interfere with movement mechanics like slidehopping. The ranges to avoid when setting your FPS cap are 65-85, 140-160, 205-230, and 275-300. If your cap lands inside one of those ranges, movement can feel sticky or inconsistent in ways that have nothing to do with your skill or your hardware. Set your cap five to ten frames below or above any of those ranges. It’s a quick fix that the Apex movement community has known about for years, but that most casual players have never heard of.
Rainbow Six Siege: Render Scale
Siege has a Render Scale setting that most players either leave at 100 or drop too aggressively when they are trying to squeeze out more frames. Render Scale controls the internal resolution the game renders at before upscaling to your display, and it behaves differently from a simple resolution change. The competitive sweet spot for most players at 1080p is around 90 percent. At that level, the FPS recovery is meaningful, but the visual difference on moving targets is minimal enough that your ability to read the game does not suffer. Going lower than that starts to introduce upscaling blur that can make it harder to track enemies through doorways and at distance, which in a game built on information and tight angles is a real problem.
These are just a handful of examples across a few games, but the underlying habit they point to is the same. Most settings menus are worth revisiting every now and then, especially after a major update or when something about your game starts feeling slightly off, but you cannot pinpoint why. The answer is sometimes in a place you stopped looking a long time ago.